Cedar chests are so versatile. They are perfect at the end of a bed to store extra blankets, have a place to sit, or a place for guests to put their luggage. In an entryway, you can store your hats & mittens plus have a place to sit and put on your shoes. They can be used for coffee tables, storing blankets or keepsakes, or even storing ammunition for the avid hunter or gun enthusiast! After all, most do have a lock but please be sure to check if it is child safe. You can order a free replacement if not! Read more about ordering replacements here.
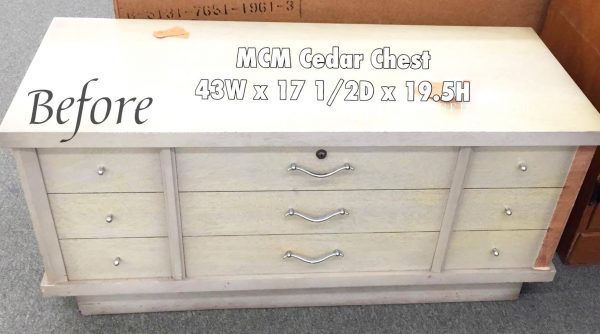
*You can see the missing trim at the far right of this picture
*Our posts may contain affiliate links. If you make a purchase through one of those links, we will receive
a small commission which helps support our blog. Please know, we only share items we use and love! Thank you!
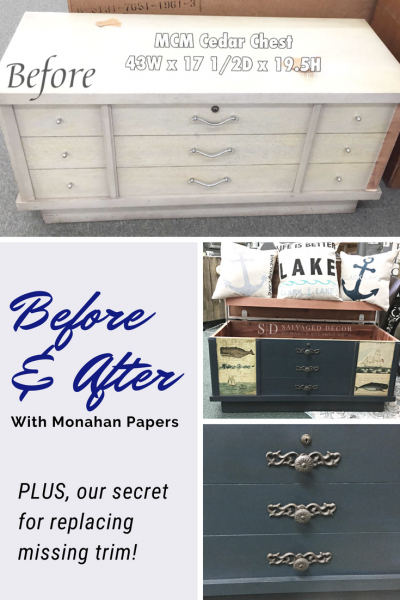
This particular cedar chest was found at a thrift store. Aside from some lifting veneer and a missing piece of trim, it was in overall good shape. I started by removing the lifting veneer. When done, I primed it with my favorite XIM primer and painted with a textured paint.
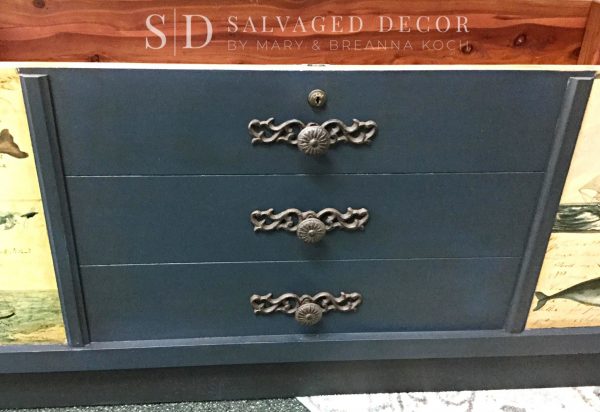
Textured paint is a great way to cover up uneven, rough, or damaged surfaces. I’ve used textured paint that I really love, but it can be pricey and I had an idea of how I could make my own with products I already had. This was the perfect piece to test it out on. I made my own textured paint by mixing some Midnight Blue from Paint Couture with Couture Crust and it worked like a charm! This allowed me to camouflage the unevenness of the wood base after the veneer was removed.
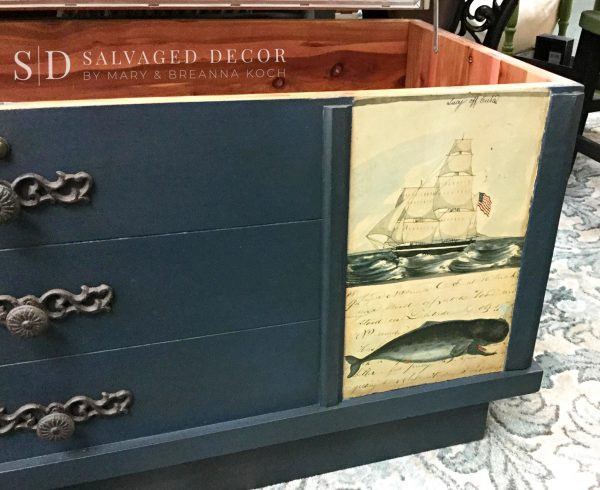
I also had a missing piece of trim on the right side (*you can see it on the right side of the before picture). To replace it, I first created a mold of the trim piece still on the left side using Easy Mold Silicone Putty. Once my mold was ready, I used Easy Cast Epoxy to fill the mold and create an identical piece of new trim. When the new piece was ready, I glued it in its place with E6000 adhesive and clamped it down so it would dry in place.
Watch our video to learn more on the steps we took and products we used to replace the missing trim.
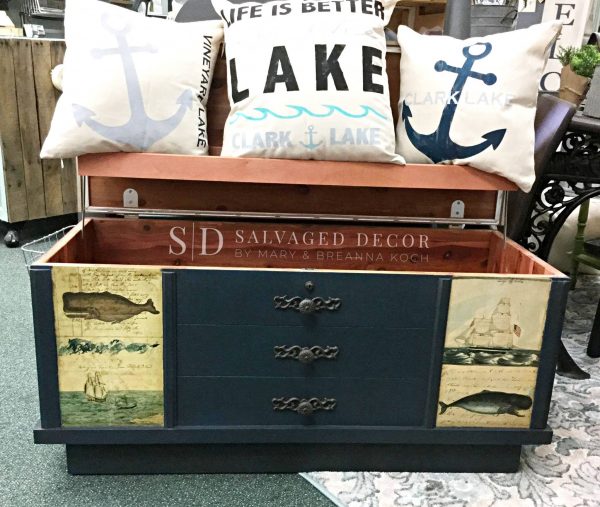
I wanted to add some visual interest to the rather flat front. I was also going for a more gender neutral look, so I decided to decoupage these nautical themed Monahan papers to the front of the chest. If you’ve ever used decoupage, you know it is a little thick. I really love using our DIY Liquid Patina by Debi’s Design Diary as a decoupage medium because the consistency is perfect and so much easier to work with! I used 3 coats to fully protect it.
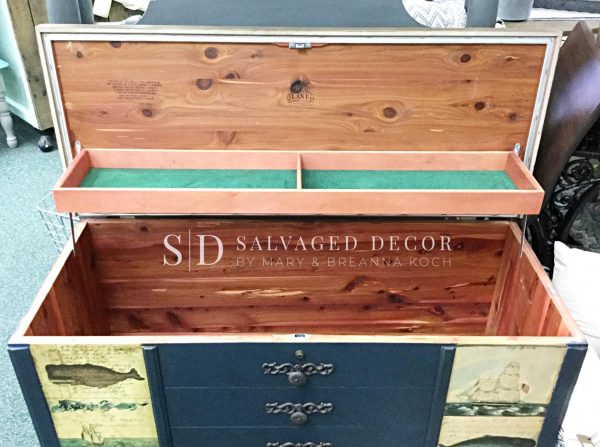
I painted the rest of the chest with Midnight Blue and the top with Madagascar Mocha, both from Paint Couture. I made my own glaze mixture using a mixed of Black Chiffon and VanDyke Brown to brush over the top to create a stained wood look. Lastly, I top coated the entire chest with Matte topcoat to protect and a light coat of dark wax over the base to tone and age the color.
This piece was quite specific so I expected it to sit for awhile, but it sold two days after putting it out on the floor! It’s always exciting to see someone else excited about taking home a piece to use in their home!
You can find a list of products we use often and highly recommend by clicking here.
Please share our cedar chest makeover on Pinterest and see more before & afters at our Salvaged Decor board.
Happy Painting ~ Breanna & Mary



No Comments